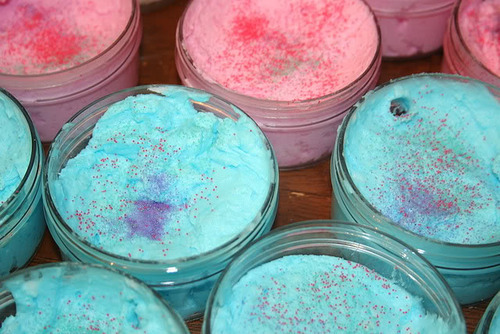
Materials and Ingredients
- Ingredients:
- 1 cup of solid soap base (such as melt and pour soap base, or a pre-made soap base specifically for whipped soap)
- 1/2 cup of distilled water
- 1/4 cup of liquid castile soap
- 2 tablespoons of vegetable glycerin
- 1 tablespoon of carrier oil (e.g., almond oil, jojoba oil, or coconut oil)
- Essential oils for fragrance (optional)
- Colorants (optional)
- Preservative (optional but recommended for longer shelf life)
- Equipment:
- Double boiler or microwave-safe bowl
- Mixing bowls
- Hand mixer or stand mixer
- Spatula
- Measuring cups and spoons
- Storage containers (jars or tubs)
Instructions
Step 1: Melt the Soap Base
- Prepare the Double Boiler:
- Fill the bottom pot of the double boiler with water and bring it to a gentle simmer.
- Place the soap base in the top pot of the double boiler.
- Melt the Soap Base:
- Slowly melt the soap base, stirring occasionally until it’s fully melted and smooth.
- If using a microwave, place the soap base in a microwave-safe bowl and heat in 30-second intervals, stirring in between, until fully melted.
Step 2: Prepare the Liquid Mixture
- Combine Liquids:
- In a separate bowl, mix the distilled water, liquid castile soap, vegetable glycerin, and carrier oil.
- Stir until the mixture is well combined.
Step 3: Whip the Soap
- Combine Ingredients:
- Pour the melted soap base into a large mixing bowl.
- Slowly add the liquid mixture to the melted soap base, stirring continuously to combine.
- Whip the Soap:
- Use a hand mixer or stand mixer to whip the soap mixture on medium to high speed.
- Continue whipping until the mixture becomes thick, creamy, and fluffy. This may take several minutes.
Step 4: Add Fragrance and Color (Optional)
- Add Essential Oils:
- If desired, add a few drops of your favorite essential oils for fragrance.
- Mix well to incorporate the essential oils evenly.
- Add Colorants:
- If you want to color your whipped soap, add a few drops of soap colorant or cosmetic-grade colorant.
- Continue to whip the mixture until the color is evenly distributed.
Step 5: Add Preservative (Optional)
- Preservative Addition:
- If you are making a large batch or want your whipped soap to have a longer shelf life, add a preservative according to the manufacturer’s instructions.
- Mix well to ensure the preservative is evenly distributed.
Step 6: Store the Whipped Soap
- Transfer to Containers:
- Use a spatula to transfer the whipped soap into clean, airtight containers such as jars or tubs.
- Smooth the top of the soap in the container for a neat finish.
- Label and Store:
- Label the containers with the name of the soap and the date it was made.
- Store the whipped soap in a cool, dry place away from direct sunlight.
Tips and Tricks
- Consistency: If the soap is too thick, add a small amount of distilled water and continue whipping until you reach the desired consistency.
- Customization: You can customize the soap by adding exfoliants like sugar or jojoba beads for an added scrubbing effect.
- Testing: Always perform a patch test with essential oils and colorants to ensure they do not irritate your skin.


